
Creating a Contact on an Organisation
Propellor allows you to add organisations and contacts to your account. This walkthrough shows you how to add a contact to an already-existing organisation. To create an organisation, see the “Creating an Organisation” walkthrough.
Step 1 – This walkthrough starts on the “Create Organisation” or “Edit Organisation” pages. Click on the “Contacts” tab in the tabs section at the top of the page.
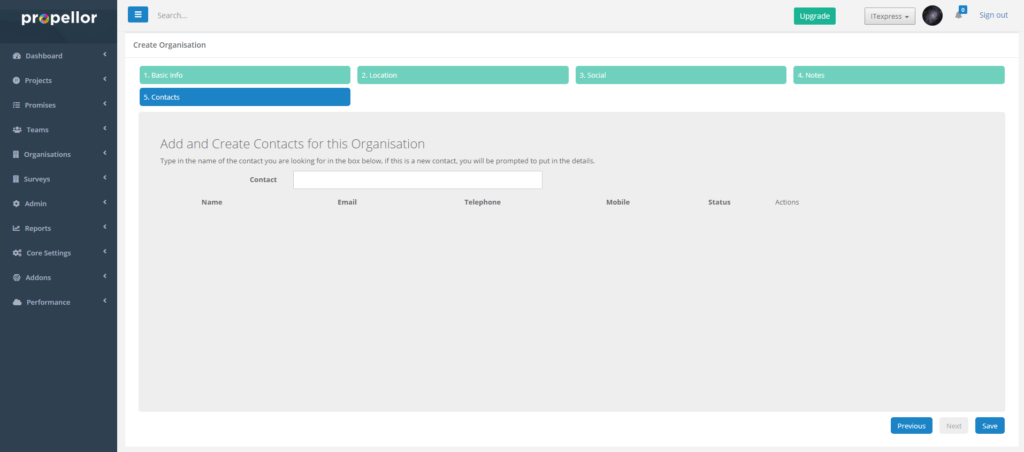
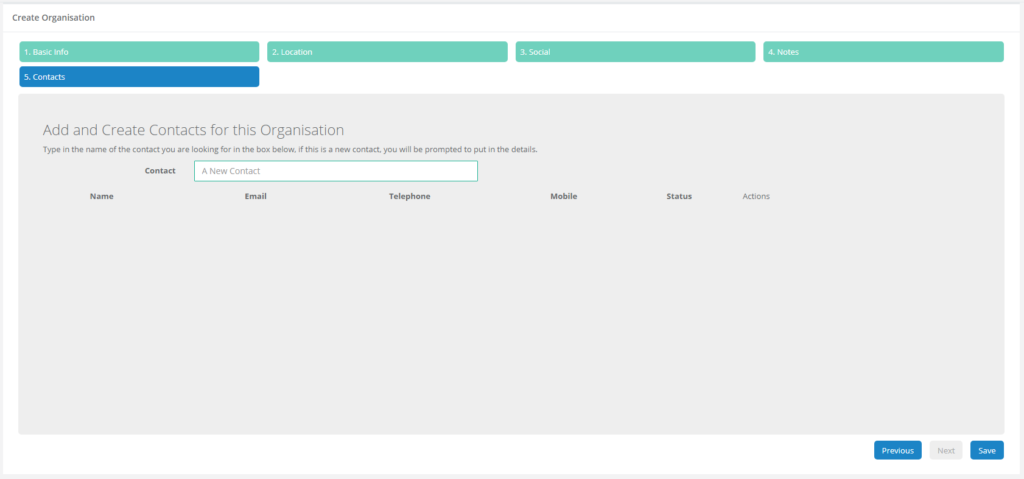
Step 2 – To create a new contact, click on the “Contacts” box and start typing a new name. Once you have finished, press tab or click off of the “Contacts” box. This will cause Propellor to check to see if the contact exists, and if they do not, it will bring up the “Create Contacts” window.
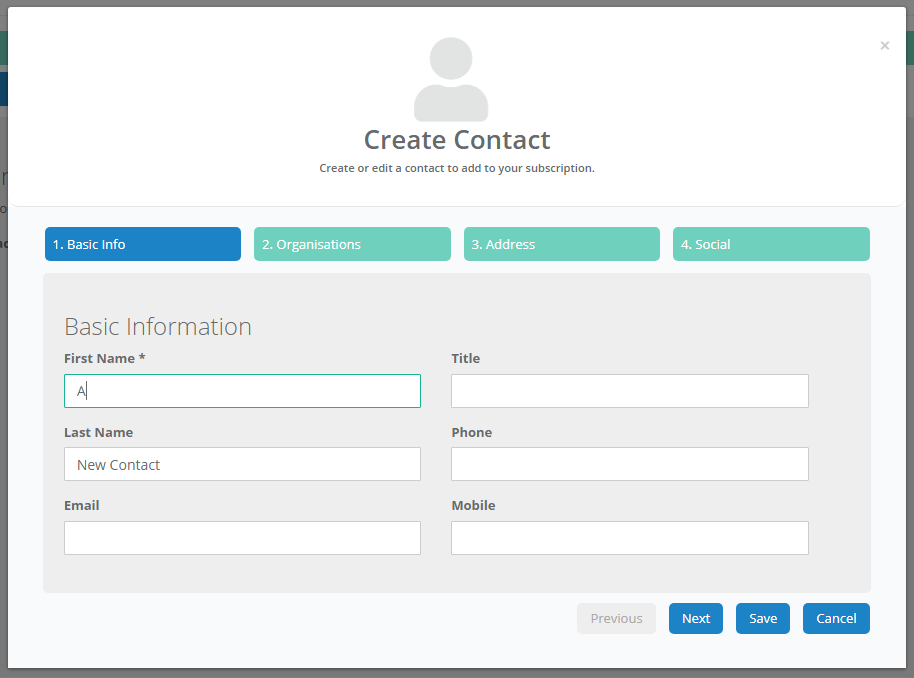
Step 3 – On the “Create Contact” window, the name that you typed in will be filled in on the “First Name” and “Last Name” boxes, if Propellor could detect those. A name of some kind is required for the contact, so you do have to enter at least a “First Name” (any required boxes are marked with a *). On the organisation page, the details entered in “Email”, “Phone” and “Mobile” are the details for this contact for the organisation (rather than the contact’s personal details). If you are finished entering the contact details at any stage, click “Save” to save the contact. If you decide not to enter the contact or have entered the page by mistake, click “Cancel” and the entered details will not be saved. Otherwise, click “Next” to go to the “Organisations” tab (Step 4).
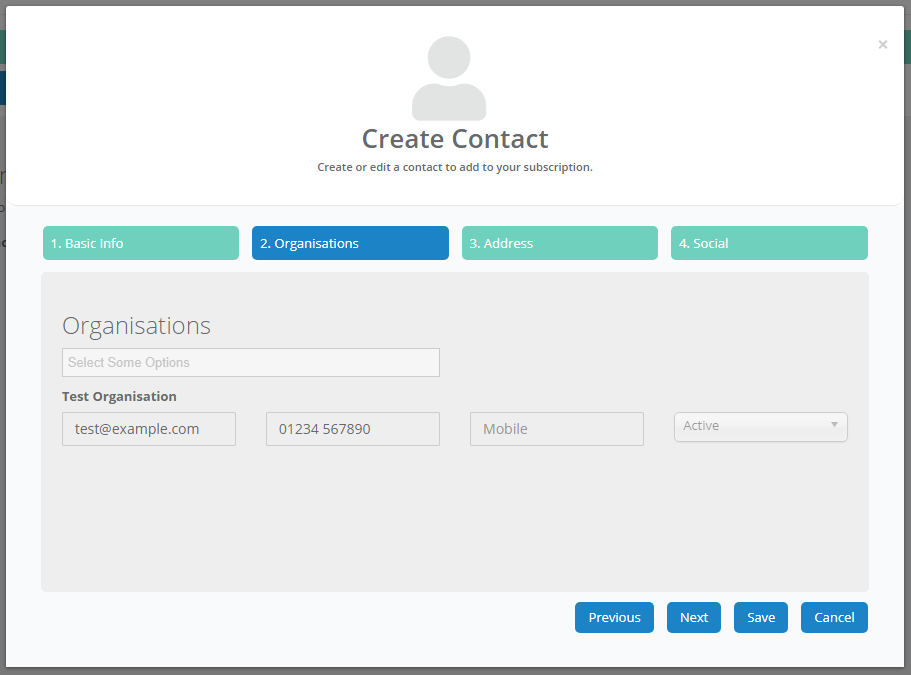
Step 4 – On the “Organisations” tab, you can see which organisations this Contact is a member of. In the case of a new contact created on this page, the organisation that you are Creating/Editing at the moment will automatically be added to this contact. The details that you entered for “Email”, “Phone”, and “Mobile” in Step 3 will be visible on this page. Click “Next” to proceed to the “Address” tab.
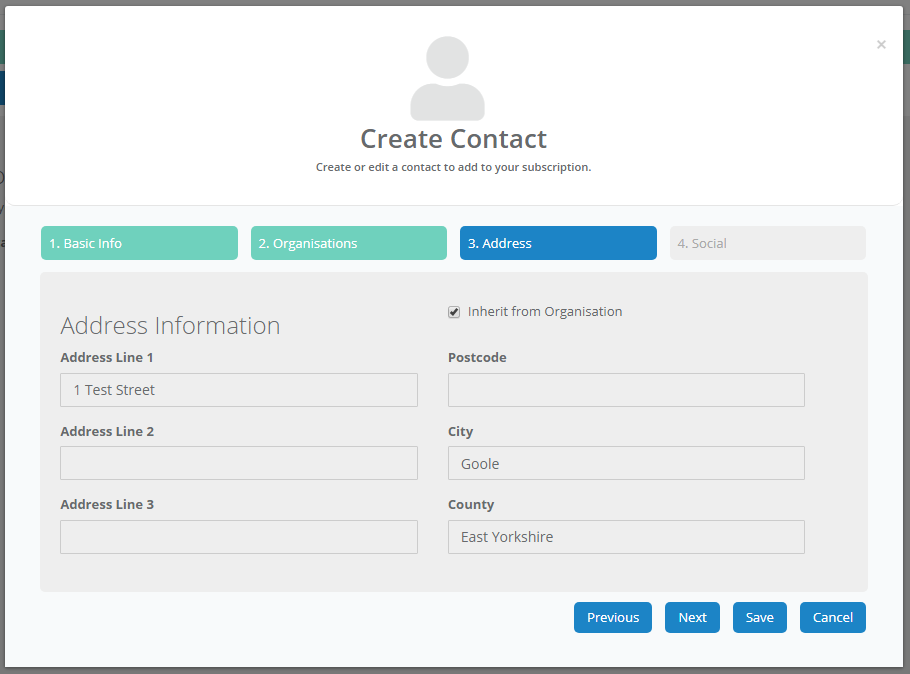
Step 5 – The “Address” tab allows you to add address details for this contact, if this information is available. If you want the contact’s address to be the same as the organisation’s address, click “Inherit from Organisation” to copy the address details over. Once you have finished click “Next” to go to the “Social” tab.
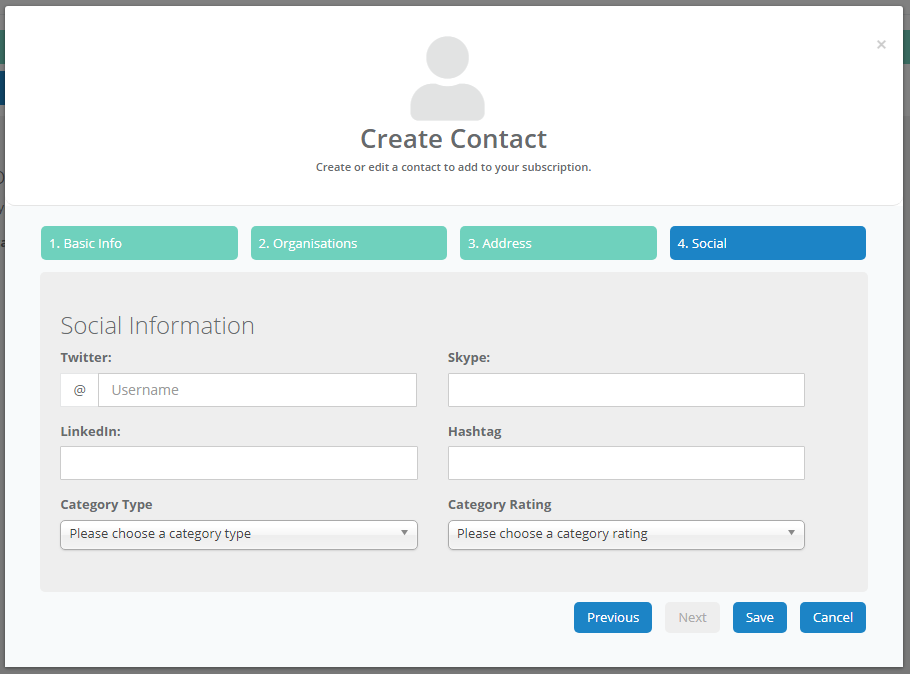
Step 6 – The “Social” tab contains various social networking fields, as well as the propellor Hashtag and “Category Type” and “Category Rating”. These are options in the “Category” section that can be used to divide your contacts into different types. “Category Type” can be used to record the type of contact, and “Category Rating” can be used to rate the contact e.g. based on how important they are to your business. These are used in Propellor for reporting purposes. Once you have finished, click “Save” to save the new contact.