
Creating a Team
If you have a number of users on your Propellor subscription, you might want to split them up into separate groups in order to assign promises so that everyone in that group can see them at once. Propellor provides “Teams” that provide you with this capability. This walkthrough will guide you through the process of creating a new team.
Step 1 – Starting from the dashboard, click on the “Teams” menu item on the left-hand navigation bar. This will open the “Teams” menu, which will display a list of teams in your subscription. Click on “Teams” at the top of the opened menu to go to the teams list.

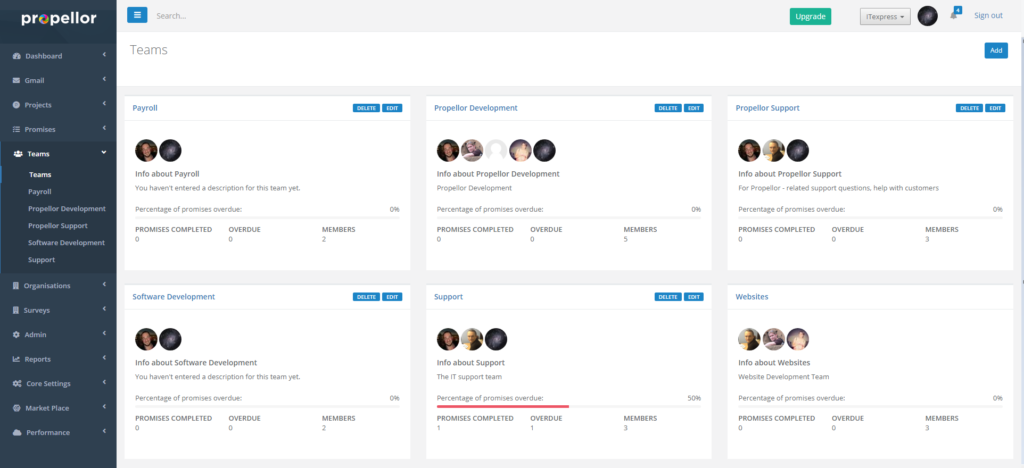
Step 2 – The teams list shows you a list of all of the teams on your subscription, with a summary of the members of each team and of the promises assigned to each team. To add a new team, click on the “Add” button to the top-right.
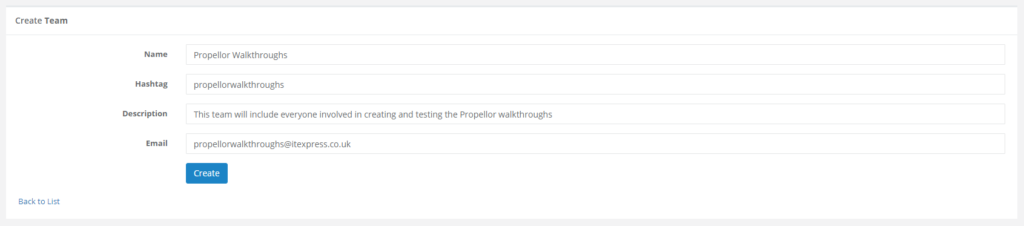
Step 3 – You are now on the “Create Team” page. Click on the “Name” box and type in the name of the team. This name will be displayed on promises and projects that are assigned to the team, as well as on any menus that are used for selecting teams, so it is best to pick a clear, descriptive name for the team.
“Hashtag” lets you add a tag (generally with no spaces) that can also be used to identify the team when adding quick promises.
“Description” is included to let you add a further, more detailed description for what the team is for, and any additional information that you want to include.
“Email” lets you add in an email that can be used to contact the team.
Once you have finished entering this information, proceed to step 4 below.
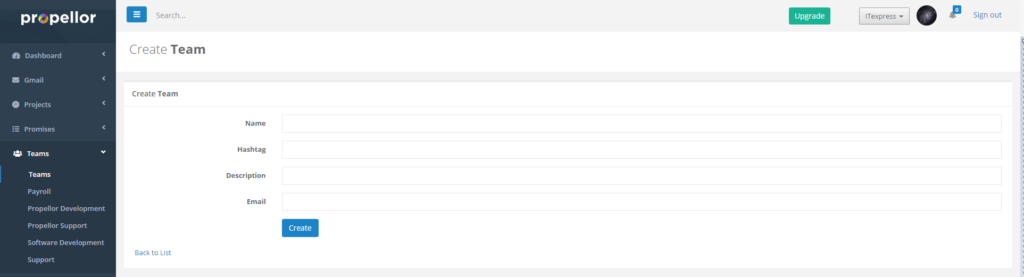
Step 4 – After you have entered all of the details for this team, click on the “Create” button to create the team, or if you do not want to create the team, click on “Back to List” to be taken back to the team list page.
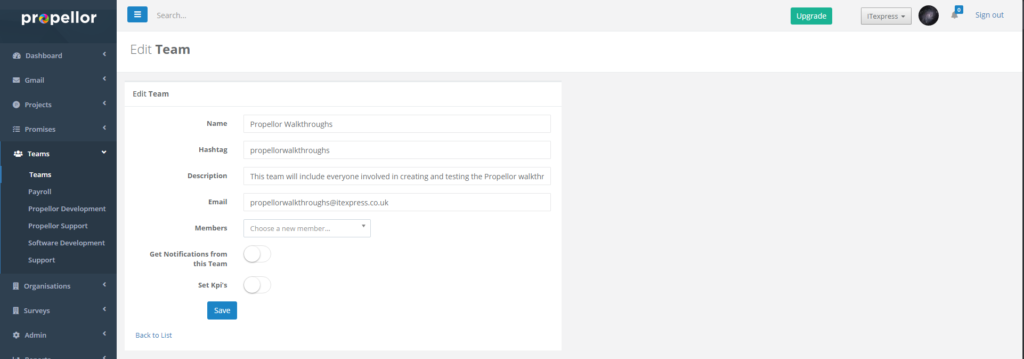
Step 5 – Once you have created the team, you will be taken to the edit page. On this page you will be able to make further changes to the team, such as adding team members. For further information, see the “Editing and Adding Team Members to a Team” walkthrough.