
Editing and Adding Members to a Team
Once you have added a team (to do this, see the “Creating a Team” walkthrough), in order for the team to be used, you will have to add members to it. These are other users on your subscription who can then be assigned to the team.
Step 1 – Starting from the dashboard, click on the “Teams” menu item on the left-hand navigation bar. This will open the “Teams” menu, which will display a list of your teams, that is, the teams that you are a member of, if any. Click on “Teams” at the top of the opened menu to go to the teams list.
Step 2 – The teams list will show you a list of existing teams on your subscription. For the team that you wish to edit or add users to, click on the “Edit” button to the right of the team name. Teams are editable if you either created the team, or if you are a member of the team. If this is not the case, then the edit button will not be available for you as a user.
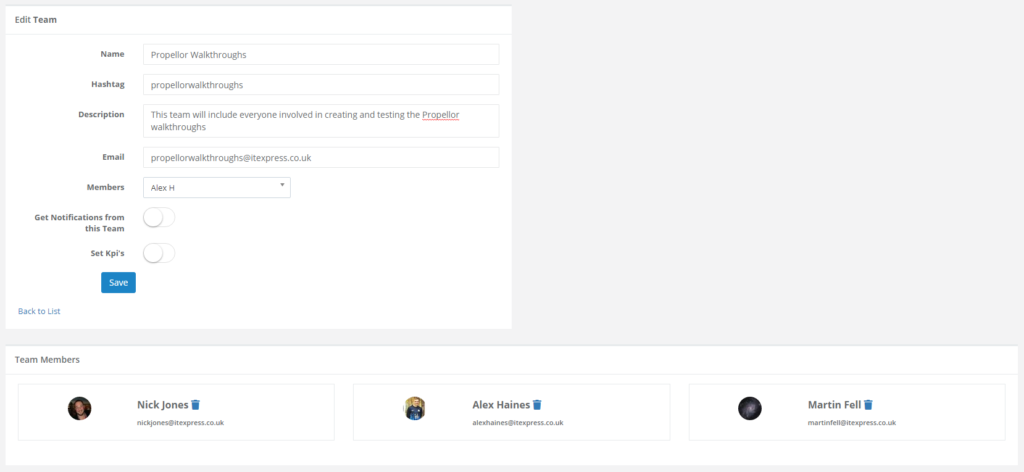
Step 3 – On the edit page, you have a number of options to edit the existing team. The panel shown above contains all of the fields that are editable on the team. These are mostly the same as in the “Creating a Team” walkthrough.
“Name” is a very important field because it is the name that will be shown to users when they are selecting the team on promises and in other parts of Propellor where a number of different teams can be chosen. As such, this box cannot be left blank. It is generally best to pick a short but descriptive name for the team. If you wish to enter a longer description of the team, see the “Description” box below.
“Hashtag” is an optional tag that can be attached to the team. In some parts of Propellor, teams can be searched for by their hashtags, for example, when selecting a team on the quick promise.
“Description” is provided to allow you to enter a longer description than in the “Name” field.
“Email” allows you to enter the email for the team, if there is one.
“Members” allows you to add other users to the team, and is described in more detail in Step 4 below.
“Get Notifications from this Team” is specific to your account, and will let you receive email notifications when events occur on this team.
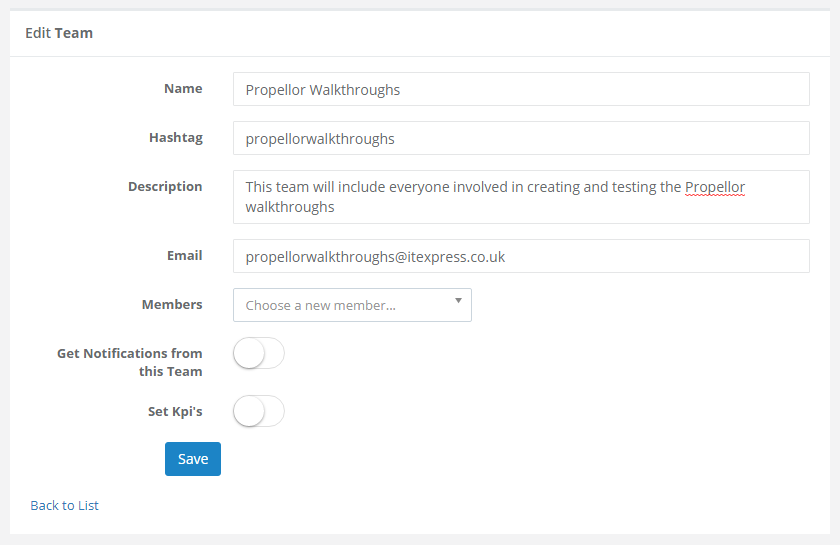
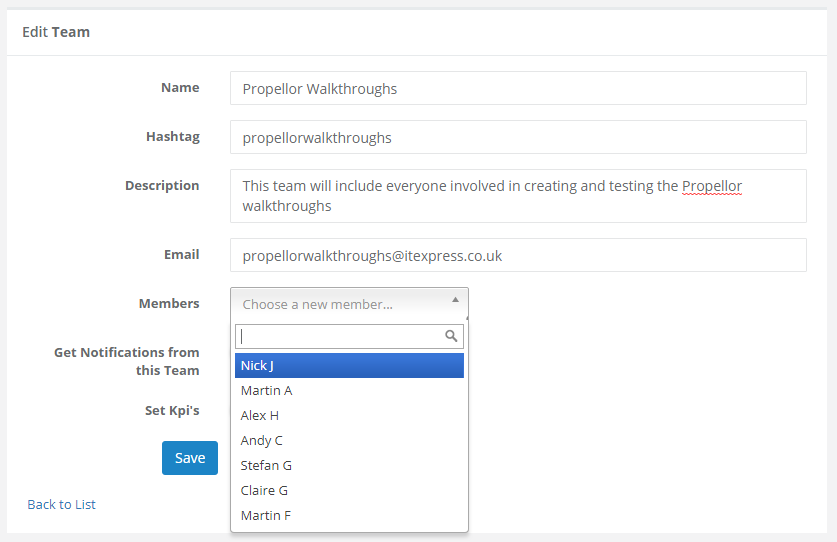
Step 4 – The “Members” dropdown allows you to add members to the team. After clicking on the box you will be shown a dropdown menu as pictured above, with a list of users on your subscription that are not yet members of this team. When a user is selected on this dropdown menu, they will be added to the team as a member.
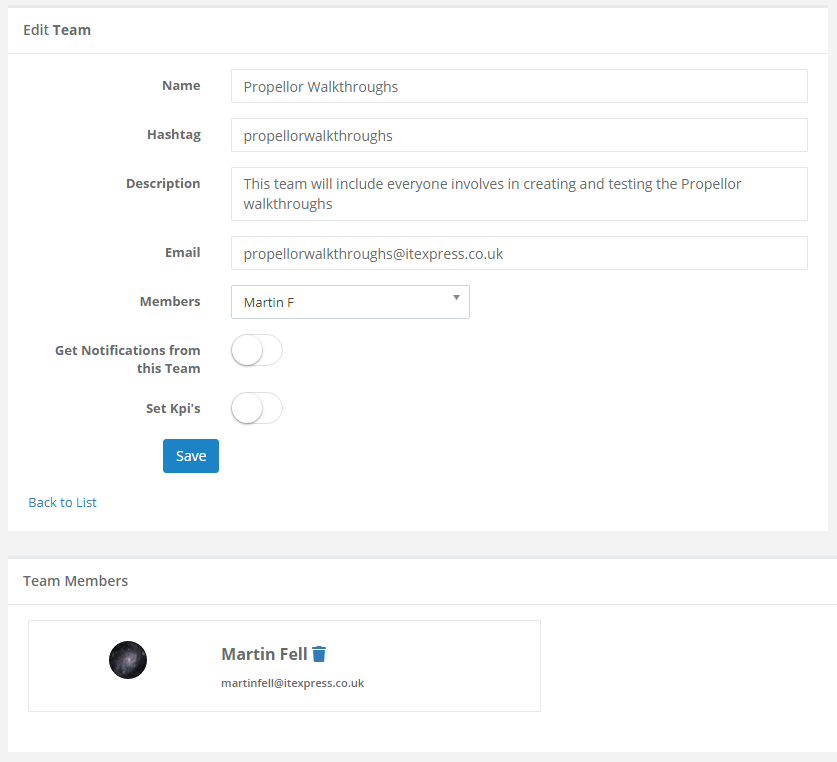
Step 5 – The users that have been added to the team will be displayed on the “Team Members” panel, as shown above. This displays the user’s name along with their email address and avatar, if any. If you wish to remove a user from a team, on this panel you can click on the delete icon to the right of the user’s name in order to remove the user from the team. This will automatically update the team member list to remove the user from the team (it is not necessary to click “save” after removing the user for the change to be saved).
Step 6 – Once you have finished updating the team, click the “Save” button to save your changes, or if you wish to cancel your changes, click on the “Back to List” link. Note that changes to the team members (adding or removing) are saved automatically after every action, so there is no need to click on the “Save” button to save these changes if they are the only ones that you made on the page.