
Creating Your First Promise and Viewing it on the Dashboard
This walkthrough will guide you through the process of creating a basic promise using the quick promise panel, and how to view it on the dashboard and activity feed. This walkthrough should give you enough information to let you create a promise, but for further details on what you can create with the quick promise, see the “Creating a Quick Promise” walkthrough.
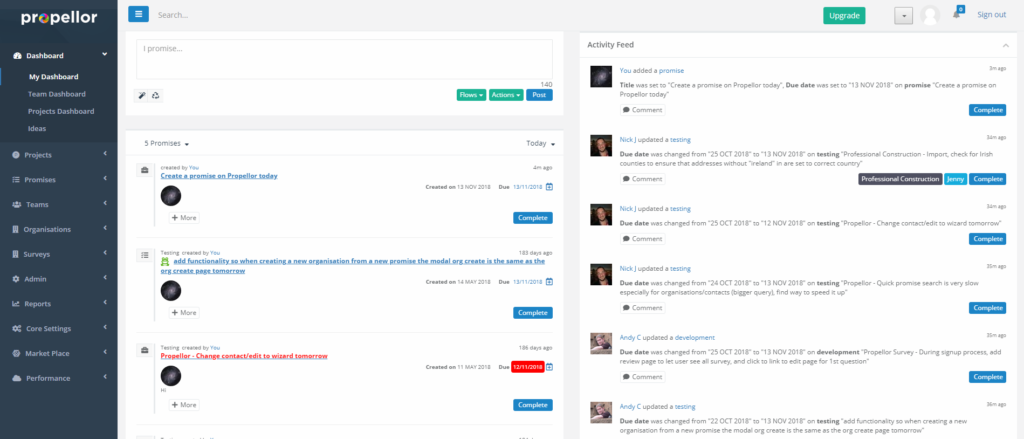
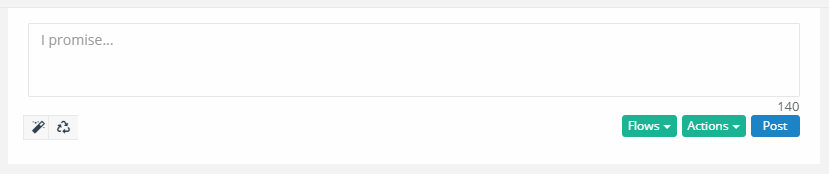
Step 1 – After signing into Propellor, you will be taken to the dashboard. This page lets you view a list of promises that are assigned to you (the list of promises on the left), and also displays a list of recent activities by yourself and other users on your subscription (the list to the right). To start out adding a new promise, click on the quick promise panel (the text area to the top left that has “I promise…” within it).
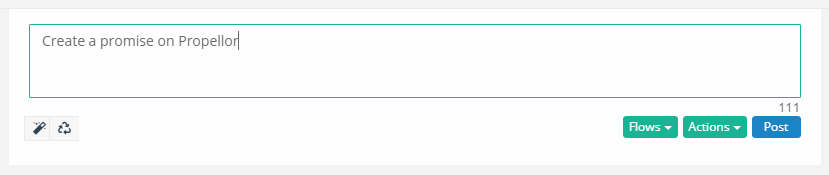
Step 2 – Start typing the title for the new promise in the box. This can be something you want to do (e.g. “Create a promise on Propellor”, as above), something you want Propellor to remind you about, or a brief description of a goal that you want to achieve. Once you have a title, we will assign the promise to you in the next step.
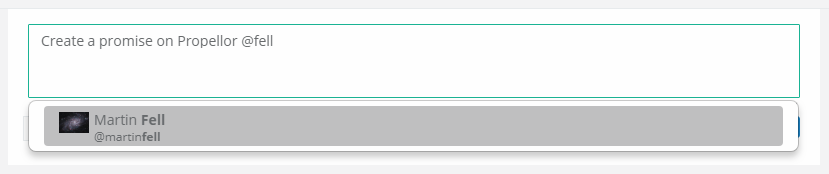
Step 3 – Now type in a space after the title and type in the “@” sign followed by your first or last name. A menu should appear with a list of users in your subscription that match what you have typed so far. In the next step we will select your account and add it to the promise.
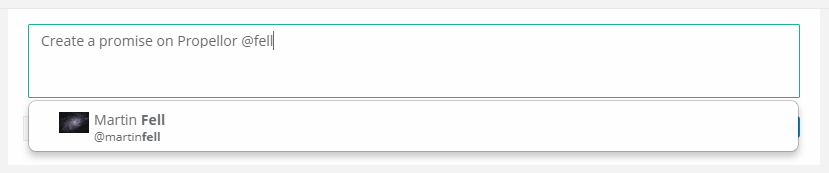
Step 4 – Click on your user name listed in the menu as shown above. This will assign the new promise to you. Adding other users to the promise is done in the same way.
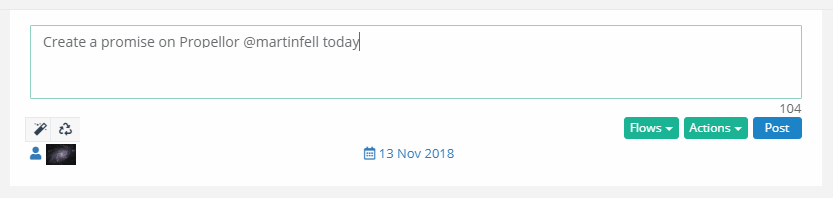
Step 5 – Your user avatar should now be visible in the bottom-left-hand corner, as in the screenshot above. Next, we will add a due date to the promise. This will affect when the promise appears on your dashboard. Type in “today”, and you should see today’s date appear on the panel near the middle, as on the above screenshot.
Step 6 – Now click on the “Post” button to the right-hand side of the panel to create the promise. The quick promise panel will now clear to show you that the promise was created, and the promise feed and activity feed on your dashboard should be updated to list the new promise.
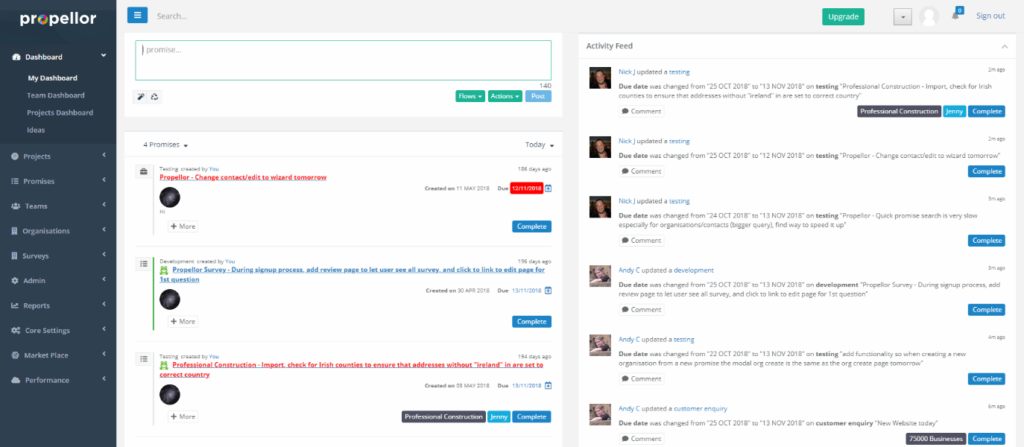
Step 7 – On the top-right corner of the promise feed (the panel below the quick promise panel), hover over the text that says “Today” to open up the menu, and click on “Most Recent First”. This will bring your new promise to the top of the list.
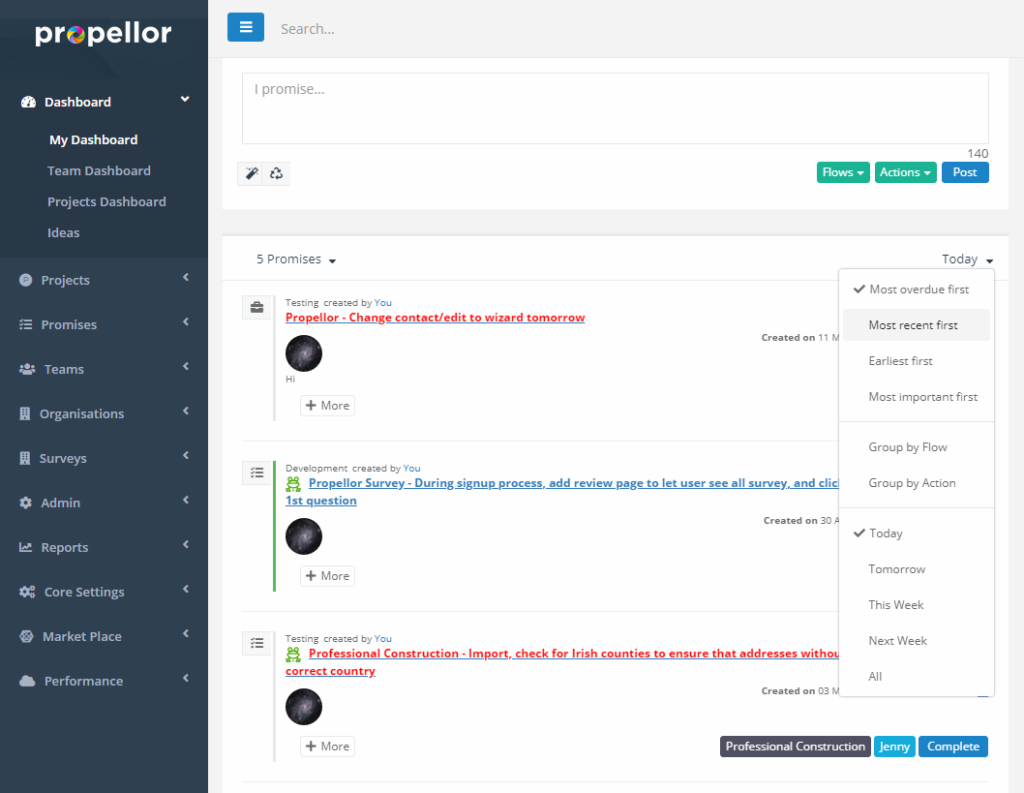
Step 8 – Your new promise should now be visible on the top of the list. Also, look at the activity feed on the right-hand side of the screen. On the top you will see a new activity that was created when you added your new promise. Congratulations, you have now successfully created your first promise on Propellor!