


Creating a New Promise With the Promise Wizard
In addition to the quick promise panel, it is also possible to create promises using the promise wizard. The promise wizard takes you through the process of creating a promise by breaking down the possible information that can be entered on the promise into a number of steps.
Step 1 – On the Propellor dashboard, click on “Promises” (highlighted on the navigation bar on the left of the screen) to open the “Promises” menu, and click on “Promise Wizard” (highlighted above). This will take you to the promise wizard for creating a new promise.

Step 2 – The promise wizard is divided into separate steps for the different sections of the promise. The first section contains the basic descriptive information for the promise. “Title” is required, and other fields may be required depending on the type of promise that you choose, if any. Once you have entered the information you require, you can click “Next” or click on the tabs “Main Info”, “Further Information”, or “Users and Department Info” to go to the other steps for creating the promise, or click on “Save” to save the promise.
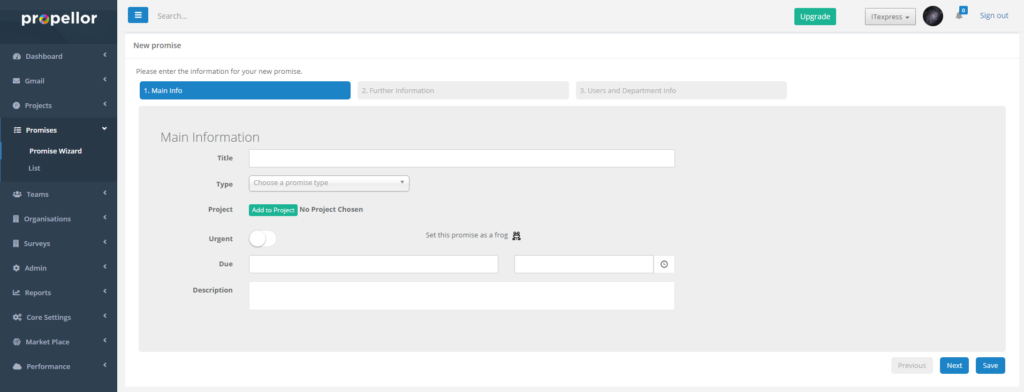
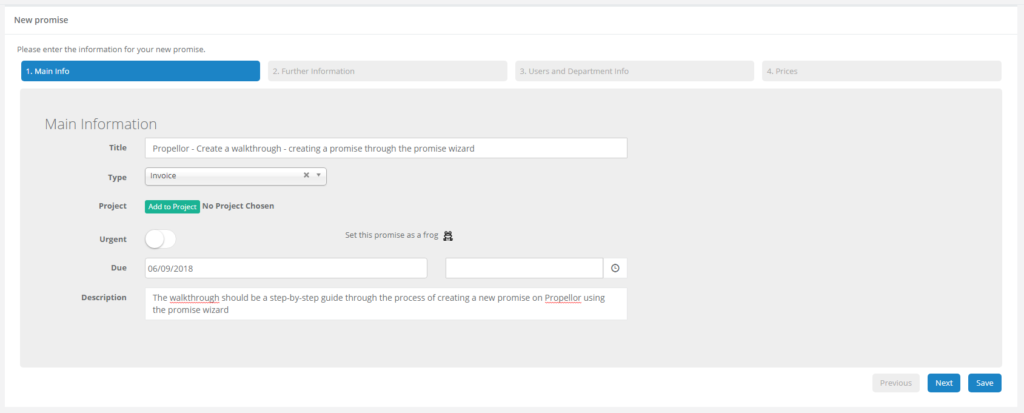
Step 3 – The “Title” is a basic overview of what the promise is about. The title will appear on the dashboard and promise lists, so it should be descriptive if possible. “Type” is the promise type, which affects various extra fields on the promise (including custom user defined fields), and also what happens to the promise when it is completed (see the “Creating a Flow (Promise Type)” walkthrough). The promise wizard will also display new tabs if they are appropriate to the promise type, for example, in the screenshot above, because “Invoice” has been selected, the “Prices” tab has become available because prices are an option that has been set on the “Invoice” promise type.
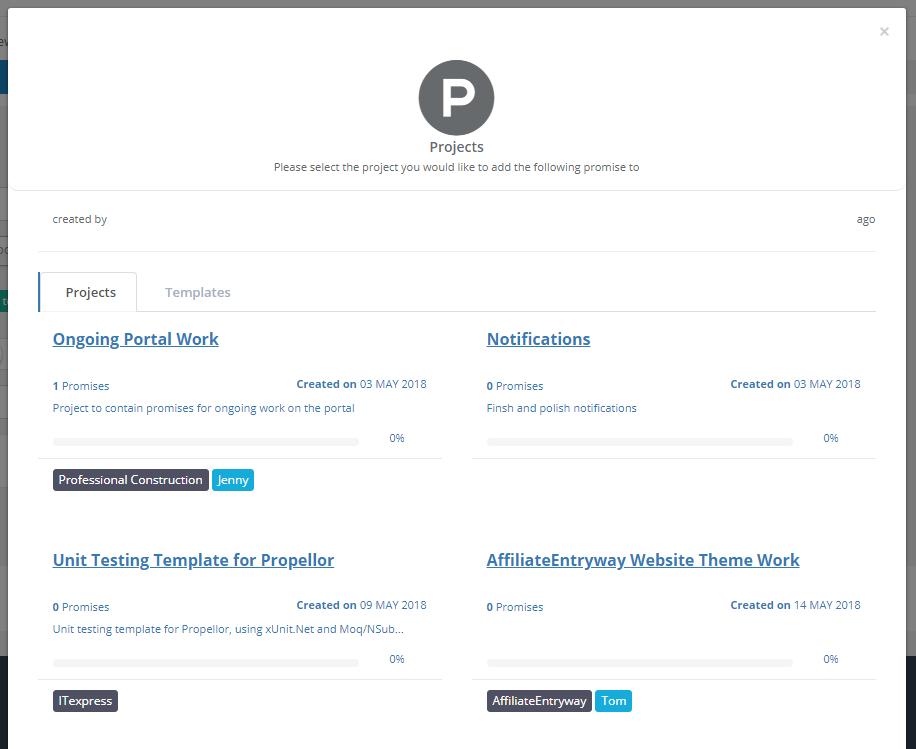
“Project” allows you to assign the promise to an existing project, and is described in more detail in “Step 4” below.
“Urgent” and “Frog” allow you to set promises as higher priority. “Due” lets you set the expected completion date for the promise, the left hand side box being the date, and the right hand side takes the time. “Description” lets you provide a more detailed description of what the promise is about or detailed additional information related to this promise, if “Title” is not long enough.
Step 4 – The “Project” option lets you assign the new promise to a project. When you click on the option, a box will appear to let you select the project. If you don’t want to pick any of the projects, click on the cross icon in the top right corner to close the selector.
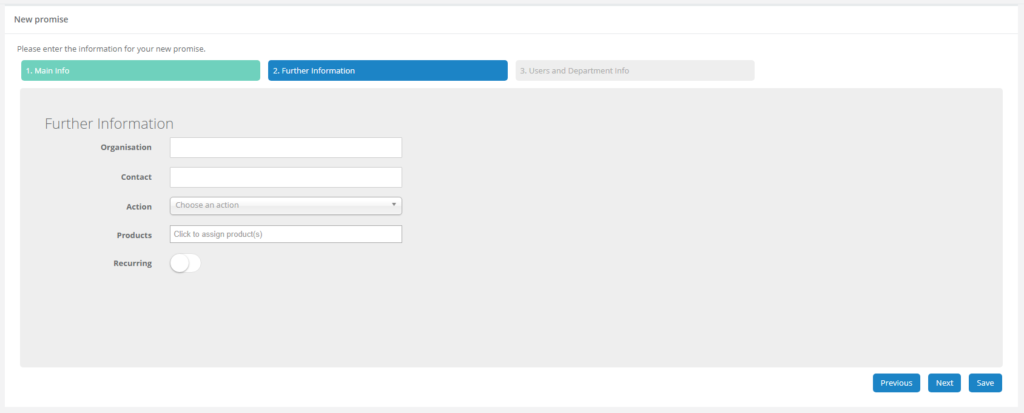
Step 5 – The “Further Information” tab allows you to attach organisation(s) and contact(s) to the promise (depending on whether the promise type is one that is set to allow multiple organisations and contacts on a promise).
On a single organisation/contact promise, click on “Organisation” and start typing in the organisation name to get a list of matching organisations. Click on one to select, or, if you wish to create a new organisation, see Step 6 below. Similarly for contacts, start typing in a name for the contact and select a matching contact, or see Step 7 below if you wish to create a new contact.
On a muliple organisation/contact promise, you instead have a “multiselect” dropdown. To use this, click on the dropdown and you will be shown a list of possible organisations/contacts. You can also start typing in a name to search the list. To remove organisations/contacts from the list, click on the cross to the right of the name of the organisation/contact.
“Action” allows you to set a descriptive action to the promise, e.g. “Call”, “Task” or “Visit”. “Products” lets you select from among a list of products to assign to the promise. “Recurring” sets the promise as a recurring promise, that is, a promise that when completed will reappear with a different date on it, if you wish to schedule a task that will occur on a regular timescale, e.g. monthly, weekly, or daily. For more details on creating recurring promises, check Step 9 below.
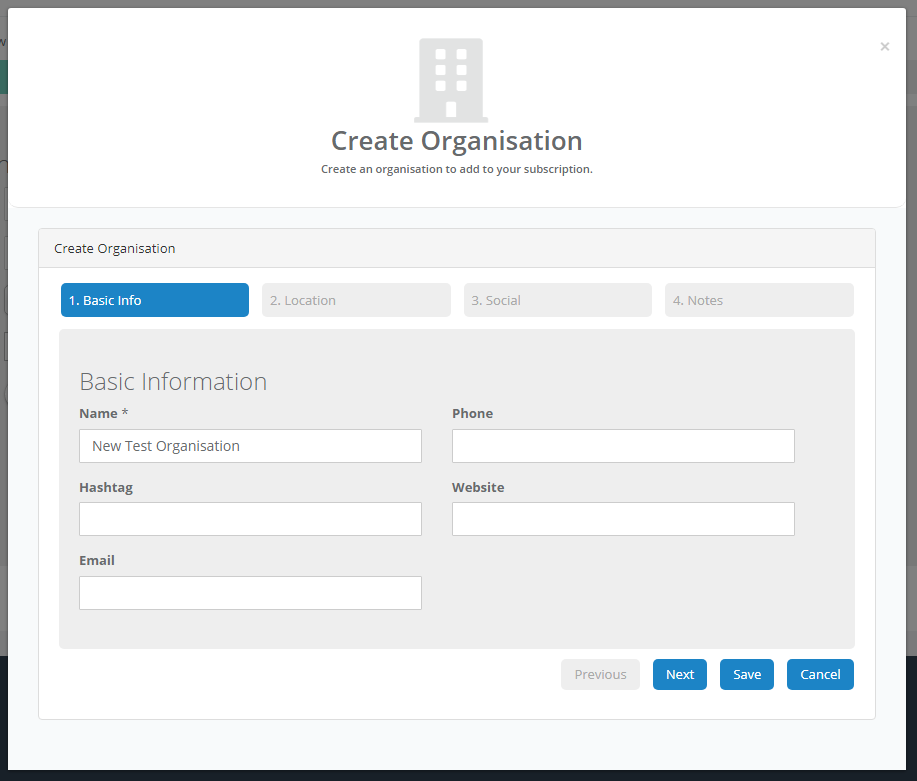
Step 6 – If you want to create a new organisation on the promise wizard, at the point where you are typing in the organisation’s name, if Propellor doesn’t recognise it as an existing organisation on your subscription, the “Create Organisation” panel will appear. This provides you with a step-by-step (wizard-type) form to enter the new organisation’s details. This panel is set up in the same way that the “Create Organisation” page is. For more information, see the “Creating an Organisation” walkthrough.
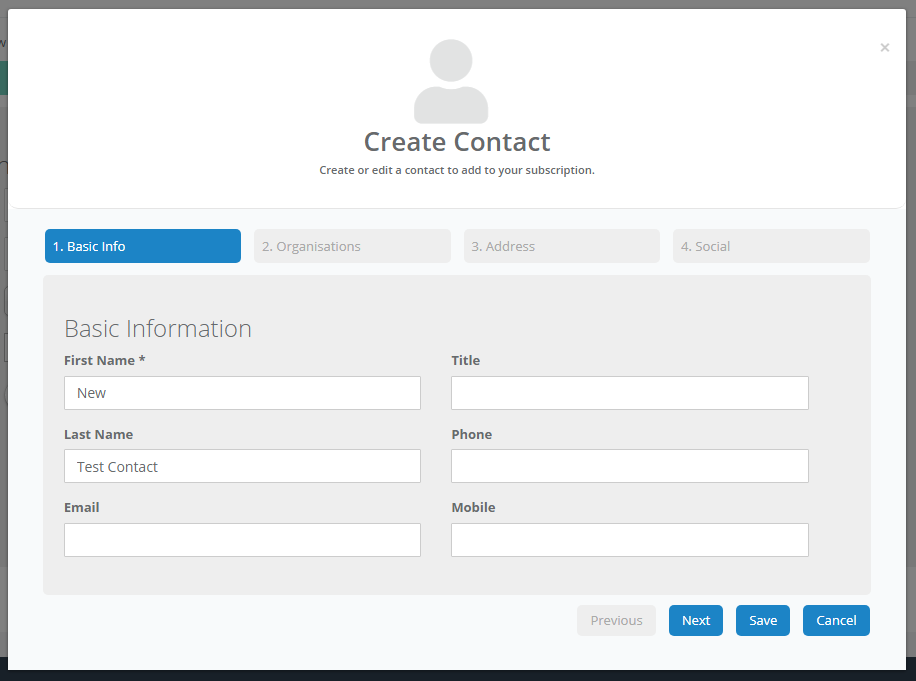
Step 7 – To create a new contact on the promise wizard, after typing the contact’s name in the “Contact” box, if it doesn’t match any existing contact, after clicking off of the box (or using tab to go to the next box), the “Create Contact” panel will open. This will allow you to enter the details for the new contact. For further information, see the “Creating a Contact on the Promise Wizard” walkthrough.
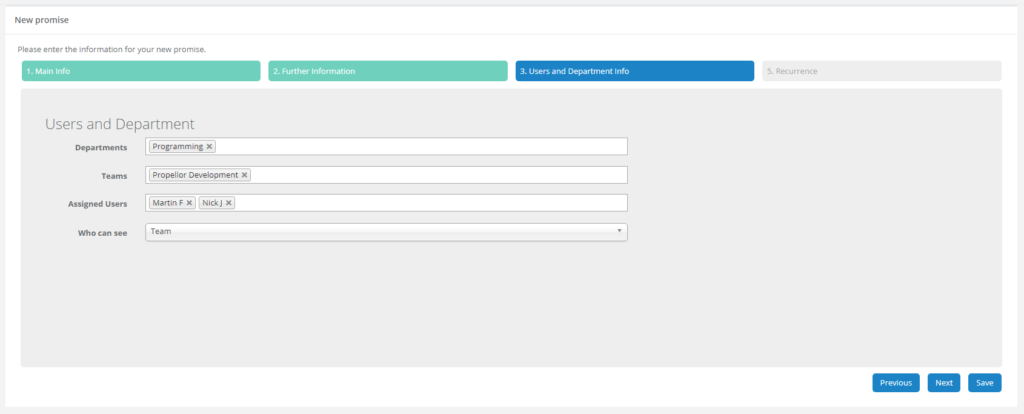
Step 8 – The “Users and Department Info” panel lets you assign a promise to a department or team, and to add users to the promise as well. “Departments”, “Teams”, and “Assigned Users” all allow you to add one or more options to the promise. To do this, click on the dropdown and choose from the list. You can also start typing to filter the list for matching items. To remove a selected item from the list, click on the cross to the right of the name.
The “Who can see” option lets you control the visibility of the promise. “Team” means that the promise will be visible to anyone on your subscription, whereas “Just me” means that the promise will be visible only to you.
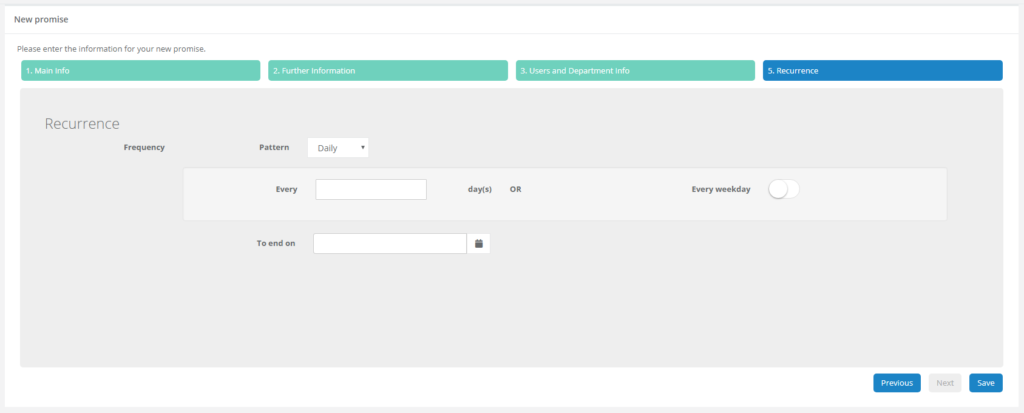
Step 9 – If you have selected the “Recurring” option, the “Recurrence” panel will become visible. On this panel, you can choose how frequently you want the promise to recur. The “Pattern” dropdown affects the further options that are available on the panel, with “Daily” allowing you to choose a number of days for recurrence of the promise, “Weekly” allowing you to set a day of the week that the promise will recur on, “Monthly” allowing you to set a particular day of the month that the promise will recur on, and “Yearly” allowing you to create the promise on a particular date of the year.
Step 10 – Once you have finished editing the promise, click on “Save” to create the new promise. You will be taken back to the dashboard where you will see the new promise has appeared on the activity feed.